Candles are the topic for this post and are very recyclable and reusable. I will show step by step how you can in fact save money. Now I know many love the scented candles and they are nice and can be homemade as well but this time we are going to be focusing on the usefulness of candles and the basic concept of making them. Keep in mind if you use scented wax from any old scented candles it will in fact hold the scent , some will burn the scent a second time. So be careful in mixing to many different scented waxes it could lead to a very stinky candle.
Any candles you have that you are thinking of throwing out can be turned into new candles , they may not be fancy or the most attractive candles but if you are like me and live in an area prone to power outages these can be a life saver. I am never without candles and haven't bought candles in years. How? I make my own by recycling the ones I have used , on occasion I do have to purchase some new wax but it is more cost efficient then buying them from my local retailer.
 |
| Size Ranges as well as color. |
Wicks , these used to be made of just about anything they could find from horse hair to old cloth ripped into thin strips. I like to use plain old simple twine., cotton twine works well and much cheaper then purchasing pre-made wicks.
Once you get the hang of it you can do two or more at a time. This also depends of the Width of your can , the wider the can the more candles you can make at one time by simply knotting your wicks to a stick / dowel and dipping them all at the same time. For the purpose of this Post I am doing only one.
This is a wonderful project to do with older children age 8 and up , With adult Supervision! And Please Keep in Mind These Candles DO DRIP! So please make sure you burn them appropriately!
So let's dive right in and get our tools and ingredients together. First your tools : Empty and clean can ( the taller the can the longer your candles) , Wicks ( Cotton twine ) , Wax ( old used candles or some Paraffin Wax ) ,Old pot for boiling water ( This needs to be large enough to hold the water and the can with the wax in it ) , Wood Skewers or Popsicle stick , Scissors , Coat Hanger , Crayons for Color and some Music ( This does take a little time and effort so the music is to help pass the time )
 |
| Supplies and some pre-made candles. |
#1 : Fill your empty can with any wax you choose ( Fill to top if you want a nice long Taper , Careful not to boil the Wax )
 |
| In Order to fill you will need to add wax as it melts. |
#2 : Place Filled wax can in Pot and fill half way with water.
#3 : Place on burner and heat to a slow boil , melt wax fully and reduce heat to low once melted.
#4 : While waiting for the wax to melt cut your Wicks , leaving enough extra to hold while dipping.
 |
| Stir to mix the color. |
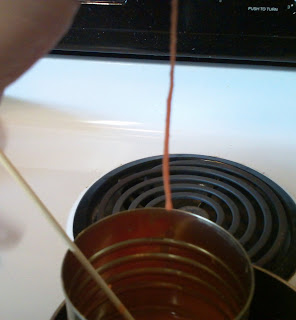
#6 : Once all is melted dip the wick , you may want to use a wood skewer or popsicle stick to push it down into the wax to get it coated , you can smooth out the candle as you dip with your fingers. Be careful not to burn yourself and be gentle the wax is still warm and fragile.
 |
| For this Tutorial I only filled the can half full. |
 |
| First Dip. |

 |
| I used my old filing cabinet to tie off and cool. |
#9 : These are fashioned after the old Taper candles , you can melt the bottom a little and place on a glass or metal candle burner or in a taper holder as long as you don't mind the wax dripping onto it.
 |
| This was for picture purpose Only. This is Not a Candle Holder! |
** Here's a Tip in cleaning your holders. You can boil some water in your old pot used to make the candles and place your holders in the boiling water for a few mins. lift out with tongs and pot holders. Wipe with an old cloth and you will have a nice clean holder to use again. **


What a great post! I have all kinds of crayons just waiting to be used. This looks like a really good idea.
ReplyDelete