Sunday, September 11, 2011

Thaumatrope - Pioneer Craft and Toy

Our Aug. / Sept. Prize
This project was submitted by one of my group members from Facebook. She is the winner of our Aug. / Sept. Contest. The contest was simple , make something from the pioneer era. Nothing to complex but something the entire group could do , everything from toys to homemade recipes were welcome.We hold a monthly contest , but this one ran over a little in an effort to let others participate. Please visit my group on Facebook for more contests and info.
I wanted to share this with you because it is simple and basic but tons of fun for the children and adults alike. It is also educational not only in the making of the toy but the history that surrounds it.


We are studying Colonial America for our history segment, so this project was timely!

The thaumatrope is an optical illusion.  When you spin the disk, the two pictures spin so fast that your eye is tricked into thinking they are one.

You’ll need:
  • a square of stiff cardboard
  • hole punch
  • two pieces of string
  • markers, crayons, or colored pencils
  • scissors

1.  Cut circle out of the cardboard.
2.  Punch a hole in each side of the circle.
3.  Draw a picture on each side of the circle.  When put together, the two pictures should make one picture, such as a bird and a cage, a mother and child, or a flower and a pot.  To make sure that the pictures will fit together, hold the circle in front of you. Flip it over from the bottom. The picture on the other side should be right side up.
4.  Tie a piece of string to each side of the cardboard circle.
5.  Hold one string in each hand and wind up the thaumatrope. When you release the circle, the pictures will spin together and form one picture.


Friday, September 9, 2011

Kitchen Kures

I have over the years been doctor to my children and thought it might be nice to share some of these home remedies as well as other useful and eco-friendly tips that actually work. These are much more affordable then going to the Doctor in most cases as well as being cheaper then most over the counter drugs , but should you be in dire need Please go to The Hospital or see your M.D.
Almost all of these can be found right in your pantry and most have more then one purpose. So let's get to it.....

1. Vinegar : This is useful for easing the sting of sunburns but did you know it is also a great anti-bacterial? Simply use it in a spray bottle to help during cold and flu season. Spritz in hair to remove build up and get great shine.

2. Baking Soda : This is a truly wonderful product. It can be used in a mixture of water and baking soda , mix to paste and apply to Acne or Razor Burn. Baking soda has so many uses I keep it in my house at all times.

3. Mayonnaise : Now some will not believe this but Mayo can actually get rid of head lice. I swear to you this is true all you need to do is apply to scalp and hair , cover for several hours and when ready wash hair and comb out lice. It is also wonderful for dry cracked feet and yes your mother was right even your hair.

4. Tea : Place a warm tea bag on the eye to help with pink eye or a stye. The natural chemicals in tea helps with the swelling and infection. Chamomile tea is a wonderful relief for those with Eczema simply brush the liquid tea onto the affected area.

5. Maple Syrup : Can be used to help fight aging , simply apply to face and leave on for 20 minutes and remove.

6. Toothpaste : This is useful for bee stings and acne as well as cleaning crayon marks off the wall. Just be careful not to remove the paint when using this method.

7. Lemons : Use to clean cutting boards. Lemons have a natural antibacterial property and will kill germs and remove stains. They are also great for removing stains from finger nails. Use daily on Age spots and watch them disappear. This is also great for stains on clothing.

8. Vanilla :  Pure natural Vanilla extract can be used to help ease a tooth ache and as a natural bug repellent.

9. Vodka : Great for jellyfish stings but can also freshen your laundry and help keep flowers fresh. Spray underarms of shirts , leave on for 20 minutes and wash.Also useful for cleaning Diamonds.

10. Honey : Terrific for diarrhea and is Truly wonderful for treating minor cuts and burns. DO NOT GIVE HONEY TO ANY CHILD UNDER AGE 1 !!!!!!

I hope these will be helpful to you and your family. Keep in mid there are many , many other home remedies out there and can be easily found via the internet. KEEP IN MIND ANY ALLERGIES YOU MAY HAVE!

Wednesday, September 7, 2011

A Corny Topic

Corn is in season!!!! Yay , hahahaha.......
My family loves corn in case you couldn't tell by the lead in sentence. Since it is in season I am able to get plenty at a good price. And that means canning , it is some work but I always look forward to canning with my 9 yr. old it just brings us closer and is a great learning experience for her.
I am not going to tell you this is an easy thing to do since the corn is going to have to be removed from the cob. But look at this way it's a great upper body and arm work-out that you don't need to go the gym for.  Not real big on working out with no results other then my looking better , I mean like to look my best but if I can get another thing accomplished then why not kill 2 birds with one stone? Hahaha.....
Keep in mind while you are shucking the corn that with the upcoming fall events it might be nice to dry a few to have for decoration. This is another post all together though and we will look into crafting corn decorations very soon. On to the canning.........
Drying can be done In Sunlight or a Dry area indoors.
Canning jams can be done with a simple water bath process but veggies need to be done in a pressure canner. I can't stress this enough since I don't want anyone getting sick.

First get everything ready , shuck your corn , sterilize your jars , have your equipment ready and at hand.

Once the corn is shucked and ready place into boiling water for 2 minutes. Remove from water and place another batch into the boiling water , you may need to add a little water from time to time depending on how many ears of corn you will be boiling. Once all the ears are cool enough get ready for your work-out. Being very careful take a sharp knife and remove the corn from the ear cutting in a downward motion. Place the corn in a large bowl until your finished with all the ears of corn. Or simply cut into a large pan.
Place the corn into the jars and add a pinch of canning salt fill with boiling water leaving 1 inch head space. Process according to your pressure canners Instructions.

Fresh Corn Year Round

Tuesday, September 6, 2011

Taters Not Just for Eating

Finished works. Halloween Invites , Butterfly and
Heart paper for letter writing. 
My 9 yr. old and I were watching a program that teaches educational crafts to children and one of the projects was making your own designer stamps. I helped her remember that we had done potato stamps not to long ago and she was even more excited. We had also used apples as stamps for an apron she made for herself. You see it's not just potato's that can be used as stamps of  course the more porous the veggie or fruit the better your stamp will turn out.
I had not given any thought to the carving tools we had used until I watched this program. You see there are many different carving tools we could be using , such as pumpkin carving tools or Polymer Clay carving tools. By using these we can actually get more detail in our potato stamps such as a butterfly which was the one we saw on the program. Of course you could also use the small metal cookie cutters for some basic shapes.

Sometimes using a paintbrush is better
For more detailed Stamps.

Be sure to Blot before Stamping. You can see
I have blotted before stamping.


Now Paints , we like using the cheap acrylic paints they are usually under a buck and we always have them on hand in this house....lol
The normal size bottle lasts and lasts , you can add a little water if you like to give it a bit of a watercolor feel or watercolors themselves can be used. Clean up with either is very easy , but if young children are stamping I would suggest using something to cover them that doesn't matter , the acrylic if it sets for 24 hours or more it is Set and will not come out. Which is one of the things we like using it for , you see stamping isn't only for paper it is a great way to let children express themselves with their clothing. A T-shirt as an example is a great way to let them show their style and stamping with a stamp they designed boosts their creativity and self expression even more.
One other tip try using other things like the side of your hand to make baby feet patterns. Simply curl up your hand and dip the side of it in paint and stamp onto your project , then take your pinky finger and dip in the paint and make the toes.... It's so cute and wonderful for expecting moms. This is the one you will see below , it can also be used as a beach theme.

Line shirt with wax paper

Curl up fist and dip outside of hand in paint.
Place on shirt , press & lift.

Repeat until walking pattern is formed.

Add toes by dipping finger in paint.


Monday, September 5, 2011

Halloween Treat Bags

I know it isn't even October yet....lol But if you look in the stores it is around us all , I don't agree with the stores doing this but I do like to be prepared so yes I am going to start posting things you can make for Halloween. As with everything I post my goal is to help everyone live more simply and making your own is one of the best ways to do this. So here we go...................
One of the big things outside of a costume is the goody / treat bag. All children want the largest and best decorated one they can get their hands on , right? Well what better way to give them exactly what they want by making it with them.
There are many different ways to achieve this even on a shoestring budget. Of course we all think of using a pillowcase or a grocery / paper bag , but what you may not have thought of is decorating them. And there are tons of ways to do this , depending on your child's age will depend on how detailed and what items you want to use for this. And at this time of the year anything goes , your imagination is your best friend at all times but will really shine during Halloween.
First the paper bag method : 1 grocery / paper bag , Tape , glue ( stick or liquid )  The rest of the things for this are up to you. I am adding some things you could use if you have them. Glitter , construction paper , ribbon , lace , wax paper , tissue paper , paints ( glow in the dark are great ) , wooden skewers , confetti  , crayons , markers , scissors and more. The list is endless. Ours is going to be a Light up Treat Bag.
Draw out Design
First sketch out your design onto your paper bag with a pencil , once happy with it cut it out. If your going to use exacto knives make sure your put something inside the paper bag to keep from cutting into the other side of the bag. Now place the wax paper on the inside and secure with glue or tape and take the yarn ,  punch a hole in the bag and tying a knot in the yarn , repeat til all four ends are secure. For added security you can glue ( liquid / glue gun ) or staple the yarn to the bag. Now for the fun part place a flashlight or a couple of glow sticks ( Glow Sticks can be purchased at Dollar Tree ) in the bag and watch it light up your design. You could also add ribbon , lace or anything you like to the top border of the bag for a special touch.
Cut out Design & Paint Bag if You Would Like.
This also works well for lighting up the walkway the children will use to come to the door using a smaller paper bag/s.  Be sure not to use candles though since the little ones tend to trip and fall or their costumes can catch fire by simply passing over the flame. Add a little dirt to your bag and place a glow stick or other non-flammable light in , also you won't need to use the wax paper. The wax paper keeps the candy from falling out of the treat bag.
Measure out wax Paper & Trim to fit.

Tape Wax Paper to Inside
Poke holes for handles and tie handles in place.
Tape or place Glow Stick Inside. The Glow stick can be
adjusted Once The Candy Starts to Fill the Bag.

Now for the pillowcase : Any old pillowcase will do and depending on how much work you want to put into it let your imagination run a muck. You can sew it , dye it and on and on. For this one we are going to paint with acrylic paints I always have some in my house with all the crafting I do , but you could use markers as well since this is a one night thing and probably won't be used again. However if you do use the acrylic paints and don't cut handles into it you can in fact let them use it for their pillow once washed. The acrylic paint must set for 48 - 72 hours before washing and only iron inside out on low if needed. Now back to the project. You can use a picture from a coloring book , print one out from your computer or if your really talented draw free hand. If your like me you'll want to print one out or use the coloring book method. Take the picture you have selected and place inside the pillow case , it's best to use a light colored pillowcase for this since you want to see your design thru the pillowcase. Now trace the design onto the pillowcase , you can put a light under the pillowcase if needed to help see your design while tracing. Pull the template out and place something inside the pillowcase to keep the paint from seeping into the other side , begin painting. Acrylic paint also comes in marker form and aren't to expensive but as I said you can use regular markers if you have nothing else on hand ( Regular Markers CAN NOT BE WASHED ).
Let dry and if you would like paint some glue onto your design and sprinkle with glitter ( GLITTER CAN NOT BE WASHED OR DRIED IN THE DRYER ) or add any other touches you would like. You could also sew felt to your pillowcase in a design of your choice and you could cut handles into the pillowcase and sew them for a nice tote effect. But I like reusing things so we are going to leave it as is other then the painted design.
The bags I have described for you are cheap and easy and for younger children. If you have an older child who is into the gore and gross aspect of Halloween , the wooden skewers are great for an added touch. Simply push them threw a let's say skull design and add paint to make it look like it's bleeding. Got the idea? The older the child the more they can do with these two projects. It's a Simple inexpensive idea and project for you and your children to share and make memories.

Friday, September 2, 2011

Under Construction

I am currently working on many blogs at this time in an effort to get ahead before the Holidays set it in. I have many , many different things to post and have to get them all in order as well as pics taken for step by step instruction. I will be posting again On the 5th of Sept. Which is the first Monday ( Labor Day ). I have had great feed back and look forward to posting all the projects , recipes , tips and tricks that I have used for years.
Everything from the quick fix to simple and inexpensive crafts as well as everything in between will be posted to help in these trying times. So please check back often to stay up to date or follow to get a heads up on the latest post. Until Monday , Have a Simple and Wonderful Weekend : )

Tuesday, August 30, 2011

Stone Soup ????

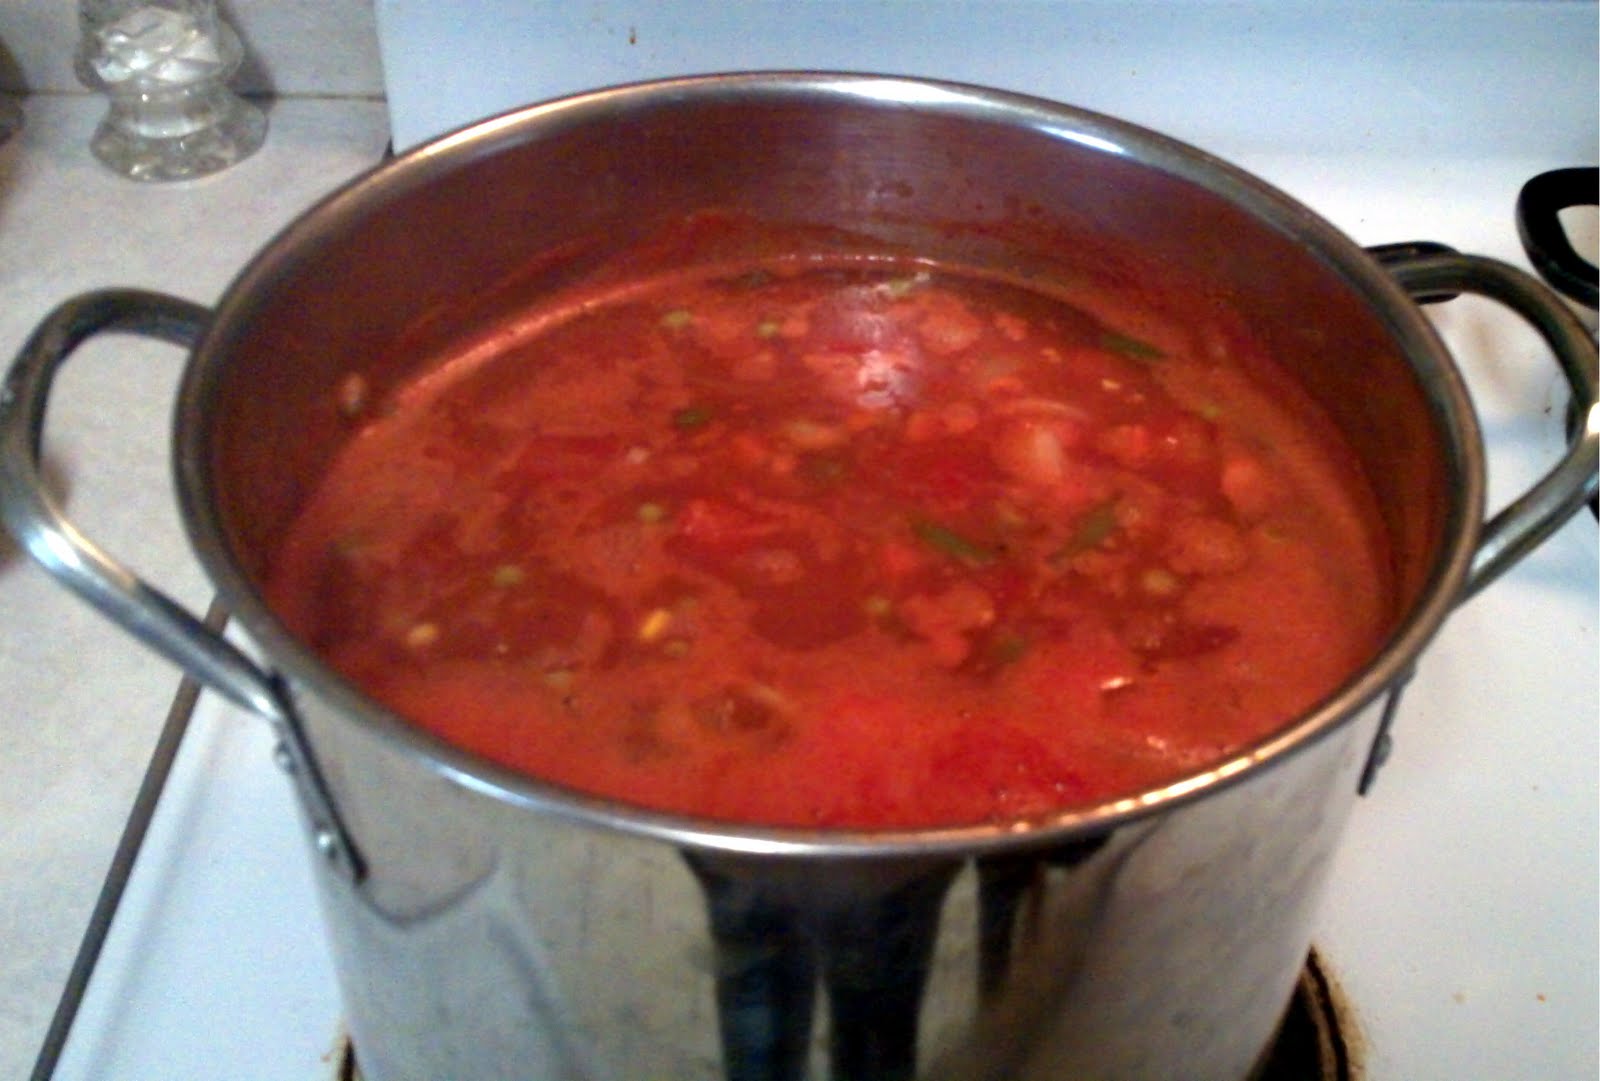
No Stones in this Soup , but everything else you can think of that is good in a soup can be added to this recipe. This is for those times when you need something filling but have little cash or your just looking for some comfort food on a rainy or cold day.
 It can also be a nice way to get friends and family together by donating their favorite foods to be added. Much like the Fable Stone Soup , make in advance and throw a dinner party or have a small gathering. Let them know the ingredients are for a Stone Soup Dinner , your sure to get all kinds of donations. The recipe can be doubled for larger amounts and no one will go home hungry.
Now I am all for making things from scratch but there are times you simply can't either due to a lack of funds or supply. Recently I went to the store to do my regular grocery shopping and they had frozen mixed veggies on sale .99 cents a bag , what a deal and I was tight for money so of course I bought 4 bags. I knew I had potatoes at home as well as onion and tomatoes. Yep you got it , veggie soup was the plan. It's filling  , healthy and cheap , not to mention the leftovers can be frozen or canned. I live as simply as possible and learning to use what you have is a huge part of that. Using what money you have and making it last as well as using what you already have to make ends meet along with your talents , skills  , imagination and determination.
This soup is best made in the morning and let simmer until dinner time. I like to serve mine with corn bread and honey butter , but alone or with bread , crackers or salad it is a comfort food that is great for rainy / cold days or just a simple way to get everyone fed.


Stone Soup :

Large Stock Pot
3-4 bags of frozen Veggies / Canned may be substituted ( 4 Lg. or 6 Sm. )
1-2 onions , peeled and diced
6 large potatoes , peeled and diced
2 large cans tomatoes , dice if needed
1-2 Tomato Sauce
1 Can Kidney Beans
3 squares Beef Broth ( Add only if not using meat )
Garlic / fresh or powdered
Salt
Pepper
Italian Seasoning / Dried
Dash of Nutmeg
Red Pepper ( Optional )
Meat if Desired
Small Pasta if desired

You can add other ingredients like mushrooms , green onion or what ever you have that would make a good soup.

Place all ingredients except for the pasta in stock pot. Measure water into empty cans and add to the mix. If needed add more water stir and add seasonings to taste.
If using meat , cook the meat then add the rest of the ingredients , why dirty more dishes?
 To add  pasta simply cook the pasta and add  *make sure you do this no more then 15 minutes before serving or the pasta could turn to soft ( Pasta can be made in advance , simply rinse and store in air tight container or baggie in the Fridge add 5 minutes before serving ). The pasta can be cooked in with the soup itself but be careful , the pasta can turn to soft and you will need to keep an eye on the amount of liquid since the pasta will absorb some of it ( be sure not to do this no more then 15 minutes before serving ). The reason I bring this up is due to the fact this is a make ahead meal. If started in the morning as recommended and simmering all day your pasta will easily break apart after cooking most of the day. So I strongly recommend cooking the pasta separately and adding shortly before serving , no more then 15 minutes before. If you don't add the Pasta this make ahead meal is ideal for busy days , it can even be made days in advance and reheated. Presto Dinner is served.

Sunday, August 28, 2011

Money Matters

Money does matter but does it matter as much as you think? We need money for food  , clothing , housing , electric and so many other things simply to live. But is it as important as the love you have for your family? Of course not  , we all know this but when things get hard as they are now in this economy it is easy to loose sight of this.
Living more Simply means making some sacrifices this is true. But it is so worth it in so many ways. I would like to share a few things with you to help ease the burden of the financial mess our Nation is in. You see I have been thru this before , as a child I was homeless for a time and didn't even know where our next meal was going to come from. Many people were in the same situation , we lived in rest areas and would bounce around while our parents tried to find work. And even then we were a blue collar family so we were never well to do and had to think and work hard for what we had. So I do know how to survive in most any situation , but things and times change. It isn't as easy as it once was to go out and get your dinner. Even if you live in an area where you can go hunting and fishing you have to come up with the money for the permits and so on. Growing your own food can be an issue as well since many people live in HOA's and if not many live in an area where it isn't allowed or there are so many rules and guidelines it is to difficult or if like me you simply have very poor earth to work with.
There is hope though. Let's face it we have to work with what we have. If your reading this you are able to access the internet and can get some coupons to help with the cost of food , household supplies and more.
One of my favorite sites is Coupons.com there are many more out there but most have the same coupons so once you find one you like and works well for you check in weekly for offers and coupons to help save some cash. Also look into brand name sites , many have offers you can sign up or directly through them and Some even have Facebook pages that you can get coupons from. I am not an extreme couponer I enjoy life to much to spend hours and hours a day cutting coupons. But they are a useful tool so use them when you can.
You can also grow some of your own food indoors. The Topsy Turvy  Planters work well for tomatoes and you won't get into any trouble with you HOA. Herbs are also nice in this device but let's face it we are more concerned with filling our bellies then flavoring our food. You can also use planters outside if the soil is to poor for growing. This is the method I use and I usually don't grow anything between June and Sept. since we get brutal heat here in Florida. There are always farmer's markets as well and you can get some pretty good deals if you are willing to haggle a little or even purchase foods that may need to be eaten right away or preserved ASAP.
The thrift stores are booming these days. Here's the problem with that , they know your going to go there and so they have boosted the prices on everything. I went just this weekend and I was shocked at the prices , much of what they were selling was in poor shape to say the least and yet the prices were as much as something I could get brand new at another local Department Store Chain. So does it really pay to shop thrift stores? It depends on what your looking for. In my opinion I would rather buy new and pay the same as the used. It only pays to shop thrift stores if your going to save money , but if your looking for furniture you may actually get some good deals at the thrift store. But stay aware , shop around just like you would even in a good economy. Just because it says THRIFT STORE doesn't mean your getting a good deal.
I do like to craft.....LOL That's an understatement to say the least , but even I know that sewing isn't always economical. If I am spending more for fabric then it costs to buy it already made I'm going to buy the already made and if need be I can alter it as needed. If you do sew I recommend singing up for any promotions you local fabric store may have. JoAnn's Fabrics has a monthly flyer you can sign up for and usually has 40% off coupons in them and sometimes more.
And Finally reuse what you already have. If it needs repaired see if it is cost effective to do so. Hand-me-Downs are a great way to stretch the money but be sure it's something they are going to wear. You can always turn a hand-me-down into a one of a kind with simple little changes and they will actually wear it. Freeze Left-overs. These make great meals on nights when no one wants to cook. Simply store in a Micro safe dish that can go from freezer to micro and Bam you have a cheap and easy dinner. There are so many ways to save if you get creative.
The thing to remember is that no matter how tight things may get or how hard it may seem there is way to survive. I am currently working on craft ideas for the upcoming Holidays to help everyone still enjoy themselves while living as cheaply as possible. Please be sure to share your money saving tips by commenting and telling us how you and your family MAKE A PENNY SCREAM.....LOL

Friday, August 26, 2011

Gluing Gifts

With the onset of the Holidays approaching , I have started preparing. However there is always a last minute gift that needs to be made. We all know what I am talking about , that last minute gift you either forgot or may have even come into your life at the last minute. If your like me you don't like leaving anyone out , I mean it's the Holidays everyone should get something special. Without having to take out a loan. This economy isn't going to allow for that and I don't know about you but I certainly can't afford to break the bank as it were this holiday season. I have always admired the 1800's in regards to this. Most gifts were in fact handmade items that people sometimes would work on all year. So I do feel that making gifts and things for the holidays to be a Simpler means of living and a Simpler way to teach our children some much needed values in today's society.
All to many times we get caught up in the madness of shopping and in fact most people would rather have something you took the time to make as a gift. It's more personal and filled with the love and compassion you have for your fellow human. But in this economy it is and can be difficult to think of ways to express how you feel , right? Wrong , this simple craft idea is one that has been used for centuries and in times of financial difficulty it has been a life saver. Decoupage , we all remember doing it when we were little so why not? Almost anything can be decoupaged and turned into a beautiful treasure for men , women , teens and children. One of the reasons I love this so much is the fact it is so simple and children adore this crafting project. If they are old enough to use scissors and glue alone they can make their gifts in secret which really adds to the joy of creating and giving their gift.
So what do you need to decoupage? Do I need special glue , paper or more? No , all you need can usually be found right in your home on any given day. White glue , magazine's  , scissors , something to decoupage and imagination. Any other odds and ends you would like to add such as ribbon , fake flowers or glitter can all be added once your basic project is dry.
Gather your supplies. Paint or treat the wood before
beginning if you like. I prefer the raw wood look myself.
For this blog we are using a little wood box I purchased some time ago for about a dollar , most craft stores have these for around that amount so when I have a little extra money now and then I purchase a few for just such an occasion. But you could use a sturdy shoe box , a composition notebook ( can be turned into a journal or diary ) , almost anything that the glue can adhere to well can be decoupaged. 
Use a small dish for glue the glue is easily washed out.
I prefer magazine's for the pictures I use in my decoupage since the paper is perfect for this. It isn't to thick or thin and the color's are nice and bright. There's always a magazine laying around my house but if you don't have one don't worry you don't need to go out and buy a new one. You can find them at your library for little coinage and at times for free. Your going to be cutting them up anyway so why spend 4.00 or more for a magazine? And most of us know someone who has them just ask if you may have a few , I have found people have no issue with this since it helps to reduce their clutter.
Sponge Brushes Work well but are not needed.
 Lightly spread glue onto back of your first Picture.
White Glue is usually something we all have in our home for one reason or another. I do have to tell you Elmer's is best. The other brands are watered down and simply don't work as well. If need be you can always add a tiny amount of water to the Elmer's but I have never needed to do this. Once the glue dries it will be clear so do not freak out , as long as you are keeping the layers of glue thin and allowing it to dry completely it will be fine. 
Apply to your Item to be decoupaged , smooth.

Depending on how you wish for this to be used will depend on placement
of the pictures. This one is for a Jewelry Box , if we change the position
and Place the lady's head towards the handle can be used as
a child's purse.
Now to get cutting , keep in mind the person you are making this for. What do they like? What kind of interest's do they have? Once you have this figured out you can start searching and cutting your pictures , this will be the most time consuming of the entire project. You can cover as much or as little as you like. Much of the old fashioned decoupage would cover the item entirely , overlapping the pictures to create something unique and stylish. 


Continue adding any pics you like in the same manner.

You can use the side of your glue bottle to smooth out any air bubbles.
Gently work the bottle back and forth over the pic to be smoothed.

Seal with a top coat of glue.
This can be done as many times as you like
As long as you let each layer dry before applying
another. 

Milky finish on wet. Once Dry it will be clear.

Once dry add you own special touch. Beads , ribbons  and anything you like.
These can be added with a glue gun or super glue.


Be sure to check back soon for some Halloween Ideas. Crafts , Food and Games.

Wednesday, August 24, 2011

The Menopausal Monster

 How I see The Menopausal Monster
courtesy of Monsters by Kristen
It occurred to me the other night that my Emotions had taken full control of me. And even though I am fully aware that the Menopausal Monster has taken up residence , I did not realize that it had taken over. Now please keep in mind this Monster is not tamed or controlled easily and since I am trying to live a Simpler Life I am not into the prescription drug option. Not to mention we simply can't afford health insurance , we have to eat , pay rent , pay car insurance , buy gas and the list goes on and on. So treating the symptoms are a bit of a hit and miss. There's so much info. out there that is easy to get lost in it all.
To many people are still in the frame of mind that this Monster doesn't show it's face until a woman is in her 50's I am here to tell you this simply isn't true. Just as when a young woman becomes a woman is different so is the Monster waiting to come alive. Women as young as 40 have been known to have this creature take up residence and control their lives. So please don't think that you are safe until you reach 50. Get prepared now , many home / natural cures are recommended early on.
Also to the family members of those coping with this creature , they may have your loved one crying at the drop of a hat or they may all of a sudden have extra energy they have never had before. They may get freezing cold and then burning up within a matter of seconds. It is different for every woman and the list is much to long to post here. Just keep in mind this is NOT THEIR FAULT. They are being controlled by the Monster within and need your love , support and understanding.
Now I have tried vitamins and for a while they worked pretty well , but I am still searching for something to help with the emotional roller coaster I have been on for about a week now. I would love to evict this evil creature and am still trying to find some home treatments that actually work.
Here are a few things I will be trying. If you or someone you know has managed to Kick the Menopausal Monster out or at least control it please share your methods with me. This creature is driving me nuts....LOL


Sunflower Seeds : These are said to help boost estrogen

Vitamin D : This is supposed to help with the Mood Swings ( I will def. be taking more of this!!! )

Meditation and Breathing : Something I should be doing anyway but will add to my daily routine


Monday, August 22, 2011

Hurricane Season / 10 Helpful Tips To be Prepared

I wanted to post my next blog about Stamping but I think that will have to wait since we are facing our first hurricane of the season. As most know I live in Central Florida and we have Hurricane Season every year. It amazes me so many are never prepared , not that I myself have not faced issues with Hurricanes. During 2004 we had 3 hurricanes hit all within a months time , so as prepared as I was it still wasn't enough.
I would like to share some simple tips with you as well as remind you of some of my previous blog posts to help those who may have to deal with the current hurricane. It could miss Florida but why take the chance?
#1 Never Wait!!!! You should be preparing year round. When you go to the store if you can afford it and it is on sale buy it. Simple things like batteries , bottled water or even candles ( never throw out your used candle wax you can remake candles by going to a previous post about how to make and recycle candles ). You would be surprised what a difference this makes in the aftermath of the storm.
#2 Freeze Water!!!! You are going to need it. Not only will it help in keeping your food cold and safe to eat but it can be melted to drink should you need it. See my post about making ice to save some money and recycling your soda bottles , milk jugs and more.
#3 Stock up on non perishable foods!!! You can purchase year round canned goods  , or as in one of my posts you can Preserve  your own , Including Meats. Having these are a life saver since no matter how much ice you make it will go quickly.
#4 Oil / Hurricane Lamps. I have grown up with these even when not living in Florida so I always have at least 2 in my home. The oil can be purchased over the year as well and stored for years so it is a must have in my opinion.
#5 Laundry : Most people don't think about this until they no longer have power or water in some cases to wash their clothing. I recommend doing your laundry daily and keeping it caught up until the all clear is given. If by chance you find you need to wash , your tub should be full of water. Take what you need and wash your clothing in the sink or a bucket if need be. Do only what you need to save on water and to keep from hurting your back.
#6 Simple tools are a must have. An Ice pic , Can opener , Screw drivers , Hammer , Saw and any other tools you think would be useful. During the 2004 hurricanes we had a hatchet and since we ran out of Charcoal we went out and found what dry wood we could and chopped it up to cook on. You will need to be creative in a time of crisis so keep that in mind when preparing for or dealing with a hurricane.
#7 Have Large Buckets or other containers on hand. During the 2004 hurricanes we were without water for over a week since we had a well. So I took large plastic containers , the deeper the better , and caught water from the rains we delt with that followed the hurricanes. We used this water for bathing and cooling off.
#8 If you don't already have one get a grill. This is going to be needed not only for cooking but if you need to sterilize water due to a lack of bleach. As I stated before you can use wood should you run out of Charcoal.
#9 Bug Repellent : You can make your own or purchase it but what ever you do make sure you have some on hand. You could be without power for a long period and the nights and rains are going to produce the bugs. Believe it or not basil can help repel bugs as well as dryer sheets. Yes Dryer sheets so if by chance you find you have nothing else go to your laundry room and get them out. Or make your own well in advance , here is the link to a Friend's Post regarding Natural Insect Repellent.
#10 My final tips are to get a list of things you will need. Many news stations offer these for FREE every year. Seal your belongings in plastic bags , have your evacuation items ready and make sure you have planned for your pets. Many shelters DO NOT allow pets. Get what cash you think you will need out of the bank and fill gas cans if possible but store them safely!!!! ( Charge ALL ELECTRONICS!!!! Things like your cell phone and lap tops will help you to keep in touch and provide some entertainment. Most can be charged by using your car battery but be careful not to drain your battery)
To be perfectly honest with you in my opinion there is no reason you shouldn't be prepared. If you live in an area that gets hurricanes you should be aware that the it is possible and likely one will hit at some point or time. Please stay Safe and Aware of your surroundings at all times. Power lines will be down all over DO NOT TOUCH THEM OR TRY TO DRIVE OVER THEM!!!!! In fact if you Don't need to be on the Road STAY HOME!!!! The roads may be flooded as well so unless you really have to don't go out driving. These are things I always keep in my home year round and think of when I hear that a hurricane may hit our area. I hope they help and encourage you to get prepared and stay prepared.

Thursday, August 18, 2011

Life in The Fast Lane

I have always loved this song and felt it was perfect for this blog post. Some may not know this song it is by The Eagles and is actually about something totally different then what I am using it for which is a useful title to lead into this post.
All that being said , I have been thinking about my next blog post and felt I would share a few things with you. My life has always been full of unexpected things coming up in my life. No matter how I try to plan things out things always change. I don't mind or dwell on it most of the time but there are occasions when even I tend to get over whelmed and simply need to take a break. My breaks last anywhere from a few days to a few months depending on how stressed I have been and what has been thrown my way by life. I think we all deal with things in our own ways and once rested we are able to get back into the game. Life has a way of pushing us to far and to fast. Hence the title Life in the Fast Lane.....LOL
I have found simple things like crafting , sewing or just cooking a new dish to be very helpful in dealing with many of the stresses I face. They also in their own way force me to slow down. 
With the approaching Holidays we are preparing to make many things , I know life is going to snowball quickly and I will be posting like crazy with tips , tricks , recipes , patterns and so much more. I also know that I will find myself thinking I will never finish or be able to keep up. So I wanted to share a few things I think may be helpful to anyone who may be going thru the same things in the coming months.These are simple little stress relievers that you can make yourself for yourself. 

Foot Rub Ointment :

You will need a micro safe bowl , some sort of small jar , essential oil and petroleum jelly.
Scoop out the amount of petroleum jelly you wish to melt and place in micro safe bowl. Heat slowly , you don't want to boil it just get it warm enough so that it will become liquid. Once completely melted add a few drops of your essential oil , be careful not to over do it with the essential oil. Mix and pour into your clean jar and let sit until it becomes solid again. This is a wonderful treat your tired  , sore or cracked and dry feet. This holds it's scent for a very long time and will last. I have actually used this as a perfume on occasion.

Scents Matter : 

You don't need an oil burner to relax  , simply cut and apple into slices and add some cinnamon to a cup or two of water and place on the stove. Heat to boiling and simmer to fill your home with a lovely , relaxing scent. You could also use lemons or oranges by cutting the peels in strips and boiling , the essential oils will start to disburse and fill the house with a stimulating scent.

Bath Salts : 

You will need some Epsom Salt , sea salt or rock salt and essential oil. 1 cup of Epsom salt 1 cup sea or rock salt and 20 drops of essential oil. Mix well and store in an air tight container.

The Eyes Have it : 

Ok so we all know a cut up cucumber on your eyes is relaxing and good for your skin. But did you know you can use diaper ointment or hemorrhoid cream as well? Yes ,I know it sounds terrible but it does work. Just a small amount under your eyes will help with dark circles and puffiness when your tired and believe it or not it actually feels good to.

These are just a few inexpensive things I do from time to time to give myself a boost and just relax letting the things of the day take a back seat if only for a moment or two.

Tuesday, August 16, 2011

Homemade Bug Spray

Garden Spray can cost a fortune these days. One big problem most don't understand is that we have thrown everything at these little critters and in time they have become immune to most products on the market. Of course let's face it most of it is bad for US as well so the thought of making our own with ingredients we know only makes sense.
Now there was a time I was a great gardener however once I moved back to Florida I have done little gardening , I had one decent one for a time but then the hurricanes came and that was the end of that. We ended up moving and I haven't been able to grow a decent garden since. No room , to many pets and the list goes on and on. I do have a few potted plants growing in an effort to teach my 9 yr. old , but it is mainly herbs and some marigolds.
Our biggest problem being spider mites , the plants we have growing now don't seem to be bothered by them. But we have tried to grow tomatoes and things and the mites have gone crazy killing everything. I was given this recipe to use but by the time I got it , it was to late. I will be trying again once the weather cools off.
I have been told this is a tried and true recipe and used for many other things around the home such as cleaning laminate flooring , combs , brushes and more. So feel free to experiment and see what works.

1/3 c rubbing alcohol
1/3 cup white vinegar
1/3 cup bottled water
2 drops Ivory dish soap

Thursday, August 11, 2011

Candles / Recycling

There was a time people didn't just throw things in the garbage , they would in fact recycle. Now they didn't consider it recycling they considered it surviving and saving money. So why throw it out if you can in fact reuse it? Companies such as Wal-Mart have made it all to easy to say throw it out we will just get another , they do this by filling your head with the idea it is easier to pay a little cash to get something new then to simply reuse or recycle what you already have.
Candles are the topic for this post and are very recyclable and reusable. I will show step by step how you can in fact save money. Now I know many love the scented candles and they are nice and can be homemade as well but this time we are going to be focusing on the usefulness of candles and the basic concept of making them. Keep in mind if you use scented wax from any old scented candles it will in fact hold the scent , some will burn the scent a second time. So be careful in mixing to many different scented waxes it could lead to a very stinky candle.
Any candles you have that you are thinking of throwing out can be turned into new candles , they may not be fancy or the most attractive candles but if you are like me and live in an area prone to power outages these can be a life saver. I am never without candles and haven't bought candles in years. How? I make my own by recycling the ones I have used , on occasion I do have to purchase some new wax but it is more cost efficient then buying them from my local retailer.
Size Ranges as well as color.
Crayons are also a great money saver in this process , since color is a must. I mean how boring to make plain white candles? So we save any and all used and broken crayons , some are better then others. I prefer the Crayola for my candles , the other brands simply don't work as well.
Wicks , these used to be made of just about anything they could find from horse hair to old cloth ripped into thin strips. I like to use plain old simple twine., cotton twine works well and much cheaper then purchasing pre-made wicks.
Once you get the hang of it you can do two or more at a time. This also depends of the Width of your can , the wider the can the more candles you can make at one time by simply knotting your wicks to a stick / dowel and dipping them all at the same time. For the purpose of this Post I am doing only one.

This is a wonderful project to do with older children age 8 and up , With adult Supervision! And Please Keep in Mind These Candles DO DRIP! So please make sure you burn them appropriately!

So let's dive right in and get our tools and ingredients together. First your tools : Empty and clean can ( the taller the can the longer your candles) , Wicks ( Cotton twine )  , Wax ( old used candles or some Paraffin Wax ) ,Old pot for boiling water ( This needs to be large enough to hold the water and the can with the wax in it ) , Wood Skewers or Popsicle stick , Scissors , Coat Hanger , Crayons for Color and some Music ( This does take a little time and effort so the music is to help pass the time )

Supplies and some pre-made candles.


#1 : Fill your empty can with any wax you choose ( Fill to top if you want a nice long Taper , Careful not to boil the Wax )

In Order to fill you will need to add wax as it melts.

#2 : Place Filled wax can in Pot and fill half way with water.
#3 : Place on burner and heat to a slow boil , melt wax fully and reduce heat to low once melted.


#4 : While waiting for the wax to melt cut your Wicks , leaving enough extra to hold while dipping.


#5 : Once wax is fully melted add your crayon color and melt.

Stir to mix the color.


#6 : Once all is melted dip the wick , you may want to use a wood skewer or popsicle stick to push it down into the wax to get it coated  , you can smooth out the candle as you dip with your fingers. Be careful not to burn yourself and be gentle the wax is still warm and fragile.

For this Tutorial I only filled the can half full.
#7 : Lift and cool for a moment or two then dip again and again letting cool a bit in between each dip. Once a good base has been made you may want to dip half way into the warm wax to build a wider base for your candle.
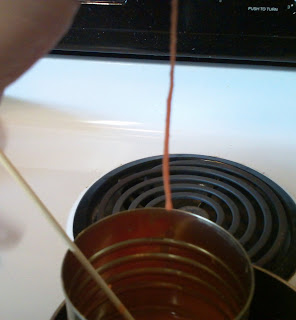
First Dip.
#8 : You will see the candle start to take shape with each dip. Once it is as large as you would like Take the candle and tie or clip it to your clothes hanger to let cool completely.


I used my old filing cabinet to tie off and cool.

#9 : These are fashioned after the old Taper candles , you can melt the bottom a little and place on a glass or metal candle burner or in a taper holder as long as you don't mind the wax dripping onto it.

This was for picture purpose Only. This is Not a Candle Holder!

** Here's a Tip in cleaning your holders. You can boil some water in your old pot used to make the candles and place your holders in the boiling water for a few mins. lift out with tongs and pot holders. Wipe with an old cloth and you will have a nice clean holder to use again. **