Thursday, April 5, 2012

Recycling Candy Wrappers

I have always loved this idea , with all the candy and what not the kids get for Easter and any other Holidays this is a useful and recyclable blessing. If you have a child this is a must to make since they go thru purses often. Simply ask your children to save the wrappers for you , of course you will want them to be as careful as possible so perhaps only the older children would be best to ask. Once you have your wrappers , candy  , chips or even cookie Bags decide what size you would like to make your bag , clutch or wallet. I have seen many on the internet but most are not very fashionable my goal was to make something fashionable as well as functional. Keep in mind this is a clutch it is not meant to over stuff  causing excess stress on the seams just as with any bag , purse and so on.
Please be sure to read the entire Blog before starting  , there is a trouble shooting section following the instructions and I really urge you to read them before beginning.

In this Blog post we are going to make a simple , stylish and functional clutch.

You Will Need :

Wrappers ( Pressed Flat either by ironing on a very low heat or pressing in a book or under a heavy book or box , trim edges insuring you get a straight edge )
Duct Tape ( comes in many different Colors these days )
Double sided Duct tape ( if sewing plenty of alcohol to wipe the needle to get the glue off as you sew)
* Optional : Ribbon or Rope ( many different things can be used for handles or shoulder strap if desired)
Scissors / Crafting Knife
Ruler
Cutting mat
Pattern ( here is the pattern I used from Country Living  :  http://www.countryliving.com/cm/countryliving/data/Bagtemplate.pdf )

What to Do :


1. Tape one side of a cutting mat over lapping the tape as you go along.
2. Lift tape from cutting mat.
3. Place the tape sticky side up.
4. Carefully place candy wrappers onto tape.
5. Trim any excess tape.
6. Place pattern on what is now your fabric and cut out the pattern
( I adjusted this pattern to a smaller version ( not shown here ) , to do this simply trim to the size you desire following the printed pattern going in an inch at a time to insure you get the size you want . You can measure with a ruler or eyeball it as I did. )

Clutch : 


Stick on Velcro does actually adhere well.
Once the pattern with the candy wrapper fabric is cut out find your fold it is the dotted lines on the pattern. Or it can be done by placing the front and back together and folding the top over. You might want to press it with a heavy book , I used a box with mason jars in it and let it sit for a day or two. Now take the front and back facing each other and use the double sided tape to adhere the front and back along the seams or as I did sew them together ( If you do sew either on the machine or by hand get your rubbing alcohol out and a rag or cotton balls and be sure to wipe the needle often  , this is to remove the glue that will attach itself to the needle as you sew. Also if you use your machine you may want to oil the sewing machine when you are done since alcohol is a drying agent and can remove the oil from the machine. ) Once it is sewn or taped together turn it right side out and press again with a very heavy book or box. Now you can add velcro or a button , if adding a button you can easily cut a button hole in the front. With the duct tape you will not need to worry about fraying there simply isn't any.


Trouble Shooting :


You may have a few seams come apart when turning right side out. In this case simply measure your seam and cut a piece of duct tape to secure the area. No , this won't work all the way around on the inside since you are going to have a rounded corner not a square one.
If the thread breaks while sewing on the machine it means your needle is gummed up with glue from the tape. Take the needle out and clean it with the rubbing alcohol , just remember to go over the area where the thread broke. I personally wiped every few stitches while sewing , it takes a little time but does work and allows you to have the rounded corners as will the double sided duct tape.
Many sites will say to use glue guns , super glue , and all kinds of glues. They will not adhere well if at all and you will not get a secure bag in the end.

Wednesday, April 4, 2012

Homemade Buttercream Frosting

I would post pics with this but we finished the cake last night , yet my little girl wanted me to post the recipe because she loved it so very much. Using only the things I had in the house I came up with this recipe based on one I had learned some time ago. Now keep in mind that cooking is an art/craft , no really it is (lol). I don't usually measure much of anything unless I am using a new recipe. I like to eyeball it and taste as I go , so here's my recipe.

Homemade Buttercream Frosting :

2 sticks of salted butter
Powdered Sugar
Real Vanilla extract
Sour Cream
Milk

Place butter in large mixing bowl and let soften. Once soft beat butter til creamy , add 1/4 cup powdered sugar and a splash of Vanilla and mix with mixer on low increasing the speed to med. Add more powdered sugar 1/4 cup at a time as it stiffens add 2 large spoonfuls of Sour Cream , continue to mix adjusting the speed up and down while adding more powdered sugar and a small splash of milk until it is smooth enough yet stiff enough for frosting. Store in the fridge until you are ready to frost. The sour cream gives it a cream cheese like flavor and is perfect for any cake.

For those who HAVE to measure everything :

I added aprox. 2-2 1/2 c. of powdered sugar , aprox. 5-6 tbs. milk , aprox. 1tsp. maybe a little more of Vanilla and aprox.1/2-3/4 c. sour cream. these are all aprox. and not meant to be exact. As I said I tend to eyeball things when cooking and I encourage you all to change it around as you see fit. If you don't have any sour cream you can always sub. cream cheese or leave them both out and make using more milk to get the desired consistency.
Let me know if you like it and how easy or difficult it was for you. Happy Cooking :)

Sunday, April 1, 2012

MIA and Raised Bed Gardening

Yes , I have been MIA for some time now about 4 months to be exact. Many things have been taking place in my life since that time. Dealing with the Holidays of last yr. being one , the cold weather taking it's toll on me in respect to the fact I tend to shut down during the winter months and recently my adopted father passed away and my mom came to live with me. So as you can see I have been busy and letting nature take it's course with me.
I am BACK!!!! LOL in full force and with many new and exciting ideas , tips  , tricks and so much more.
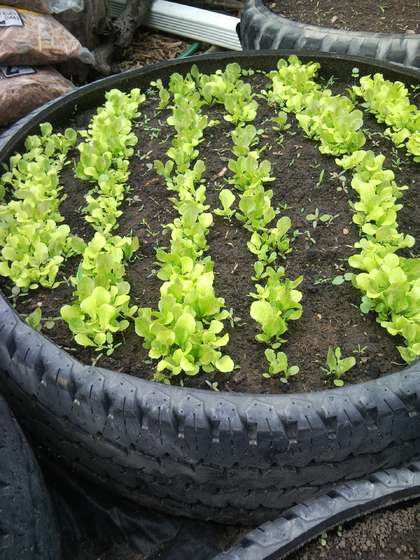
One of my latest projects has been to build a raised bed garden , now we were very lucky to find a kit at a very affordable price from the HOME DEPOT   , but you can use many different things to achieve a raised bed.  Some people use old tires ( although these days unlike our great grandparents have many , many chemicals so I really don't recommend them ) , bricks , cement blocks or left over wood can all be used. One of the most interesting things I have seen recently is a garden made totally of 2 liter soda bottles , so you see as always get creative and use what you have at hand.
From Pergola Nurseries FB Page
Living in Florida I have no real soil to work with so a raised bed garden was the best solution , now keep in mind this means purchasing soil as well as all the other needed items such as bug spray , fertilizer and since we live in a such a humid environment fungicide as well. Many of these are organic and some can even be made at home with such items as simple dish soap , cooking oil and vinegar. The choice is yours to make when it comes to the things you use. I myself try to be as organic as possible but even I have to use a bug spray that will kill leaf miners and although most people say they do little damage to a plant I am here to tell you they are wrong when it comes to Florida. I have lost more tomato plants to these little pests then I can even list but my spray is mainly organic so I feel as if it is a nice compromise , considering I would loose everything otherwise.
I started planting in early Feb. and the pics you see are the result of time , watering and plenty of care taken.
We currently have tomatoes , collard greens , onions and strawberries growing but our newest plants are peppers spicy and bell , eggplant and green beans. Now you will need to keep in mind where you live before planting , what are your seasons and how long do they last? In many cases with proper care you can in fact keep your plants longer then recommended by the companies selling the seeds or starter plants.
I recommend you plan ahead , you can start your own seedlings with an egg carton , little soil and seeds
( which are much cheaper then starter plants ) plan about 2-3 months ahead and place in a window sill so they can get about 6 hrs. of sunlight a day but be sure to move them in the evening when it gets cold if you live in a northern climate.
Once they get big enough about a month into the growing process you will have to transfer them to something larger perhaps a milk carton such as the ones children get in public school or anything in this size will work just be sure to make drainage holes no matter what you use. Once they are well into the growing cycle about 3 months after first planting the seeds you can transfer them to your garden.
Another tip is to save your seeds from any produce you purchase. Some may not like this idea since so many chemicals are present in store bought produce but it will also work from any produce you grow such as watermelons and peppers to name only a couple. Any seeds your can safely remove can be dried and then planted. To do this take your seeds and gently wash with cold water then place on paper towels or newspaper to dry. Depending on your seeds will depend on how long it takes them to dry out fully most take a few weeks and when fully dried can be stored for future use. Remember to keep them dry!!! Once done simply plant and watch them grow.
This is one of many Unschooling projects we do , many more will be soon to follow since hands on education is our families main goal.
All of this being said here is a list of links you might find useful to get ideas for your own garden :

Pergola Nurseries

Raised Bed Gardening

Recycled Tires For Raised Beds 

Brick Raised Beds

Home Depot

Friday, October 7, 2011

Simply Unplugged

I had been wondering why I was struggling as to finding time for this blog as well as tending to my home and the needs of my family. I found that I have been so connected to the internet that I was missing out on many things. I found this out by reading my own blog posts , ironic I know but it's true.
You see it was and is very full filling to share and write my blog posts but I realized I wasn't truly practicing what I was preaching. Oh sure I was making and doing with my family but not to the extent I really wanted. The house needed dusted , floors needed a good scrubbing and so on. In general I was slacking on some of the most important things , to me that is , my home which to my thinking is the center of family. For days now I have been cleaning , organizing and preparing for the upcoming holidays. I have not had time for getting online daily and I have left FB behind outside of sharing my blog posts with my group. I have to tell you this is such a relief , I am happier , more relaxed and still find time to make and do with my family. Of course I usually plan certain projects for certain days and other things I find time for in the evenings. I actually picked up my crochet needle last night and started crocheting.
One of the other things we have done to unplug is to turn off the Television once we have watched the morning news. We turn it back on around 3 or 4 in the afternoon but other then that it is off. We have not missed it at all in fact it actually makes things go faster and we are more relaxed even as we do chores or other projects. Like many people we would leave it on just to make some noise but it was actually draining us of our day.
I find it odd how we can get so caught up in the latest technology that we really do waste our time and lives with it. And I am as guilty as the next person , but I have vowed to only get online to write my blog posts or check up on my grown children. FB is no longer a part of my daily routine and the television is only an entertainment provider not something I have to have on 24/7.
I will still be posting pretty often but not as much as I did at the start. If I am to actually teach people about a simpler life then I need to practice what I preach and to be honest it is working out just fine. We couldn't be happier just enjoying the simple things in life and at times that may mean a little more work but for us it is just fine. We enjoy working together for one common goal. That goal is to just be happy and healthy by making sure we have enough food to eat , a decent roof over our heads and clean clothes to wear.
I suppose to some it sounds odd that a woman in her late 40's would find such pleasure in slowing down and just enjoying life. Not stressing about the fact I may not have designer this or that  , or perhaps being all consumed with my wrinkles starting to show. Actually wanting to go back and do the work that is so rewarding , basic and simple. But I can assure you that I am that woman and as I said when I started this blog I am relearning to live simply , this is a journey for me as well as you the reader. I am sure there will be more enlightening to come for me , since I have only been on this journey a short time. But I think I am headed in the right direction for me and my family and am as excited now as I was when I first began.
Many thanks to all my followers and all my FB group members for your support and encouragement.

Tuesday, October 4, 2011

Tombstones


One of the fun things about Halloween is all the crafting we do. One of our favorite projects is setting up an old fashioned grave yard , the kids in the neighborhood just love it. Now I used to actually dig up soil and dump it in the form of a fresh grave , until my husband complained that we did not get enough of the mess up after the big night and it was messing up his front yard...lol One Year we even had a hanging tree we made out of a large tree branch , complete with a head separated from the body below.
So now we simply add tombstones and body parts , some cob webs , an old strobe light I bought yrs. ago , some scary music / sounds and call it a day.
To make your own tombstones you will need some simple things. Cardboard , paint ( Black and Gray ) , Scissors , Glue or Tape and a stake to secure into the ground. This can be done with old wood as well , hint  , hint......

Start by getting an old cardboard box and cutting it into the form of a tombstone. Saving some for a stand if making these for table top decorations.
Paint with the grey paint , front first let dry then the back. Once dry use the black paint to write something on it and decorate with any cracks  , spiders or other spooky ideas. These are not for rainy weather so you may want to place these a little before the trick or treaters make their appearance.
Attach to the stake with glue or tape and place in the ground. Make many of these for a full graveyard.
 For the table top decorations simply follow the above directions but instead of using a stake to secure this you will cut out a back tab to attach. To do this cut out a triangle ( one side should be straight and longer , see pics below ) , bend slightly at the longer end and glue or tape to secure. Place on the table with some other spooky decorations such as cobwebs and presto.

Some cute sayings for your tombstones :
Here lies Mrs. Derns Now being Eaten By Worms
Here lies I.M. Dead
I.M.A. Goner
Here lies Mr. Jones Now He's Just a Bag of Bones


Sunday, October 2, 2011

Short Break

As some may have noticed I haven't posted a new blog for a few days. I do enjoy posting and sharing but I also have to admit it can get a bit over whelming at times. I do my best to include step by step pics for people to follow but I don't have a great camera  , this makes it a little harder.
I am working on some new posts in keeping with the current holidays approaching. I am trying to purchase a few basic supplies needed but as with most Americans right now I am dealing with budget issues. So I am having to rethink how to make them in a way most can do as well. Little to no money is my motto in an effort to live more simply and I as well as anyone struggles at times with this concept. The fact that I can't run to the store or internet to purchase supplies makes me want to share my skills and ideas even more.
I have some wonderful ideas for table decorations as well as yard decorations and am bursting to share them with you all. So please be sure to check back in the next couple of days for the newest post / project.

Thursday, September 29, 2011

Trash Toppers ( Halloween Hats )

I love recycling , so much so I have found a way to use most everything others would throw away. This also saves me money and is just plain fun.
This is one of my many ideas for recycling and can be used for other holidays as well. But I thought with Halloween creeping up on us , hahaha that this would be something perhaps you could use or build on to make an inexpensive costume for you and your children.

You Need :
Plastic bowls / microwave bowls from store bought frozen food section , yogurt cups or old plastic drinking glasses. Glue gun , white glue , glitter , scissors , ribbon  , elastic / string and any other decorations you would like to add.

1. Clean and dry the item you choose to use as your base.

2. Poke 2 holes one on each side for the elastic or ribbon / string to secure your hat to your head. This can be done by hammering a nail threw or drilling with a drill depending on the thickness of you base.

3. Paint with white glue and sprinkle with glitter. Take your time doing this , it is best to do in sections. Let Dry. You may want to do this more then once and a final layer of glue can be used as a sealer. Simply paint on the glue over the glitter and let dry.

4. Attach any ribbons , flowers or other decorations securing if need be with the glue gun.

5. String elastic threw one of the side holes and knot. Now with the hat on your head measure the elastic to the proper size and thread threw the other hole and knot.

Tuesday, September 27, 2011

Sand Art

Living in Florida I have tons and tons of real sand everywhere I look , but some may not or just want sand in a different color. This sand is great for making pictures or for those of us who remember the sand art in jars. After making the sand I will show you how to make some sand art in a decorative jar. There are a couple of ways to do this and I will explain both.
Native Americans have been creating sand art for some time as well as Tibetan Monks , Australian Aborigines and Latin Americans on Certain Christian Holidays. There are many different opinions as to when and where it originated. But it is still considered an art form and can be very detailed.

You'll Need :

Table Salt , Chalk , A Pie tin or other holder , paint brush , piece of paper

How To :

Pour some salt into the pie tin and take your desired color of chalk , place paper in bottom and start rubbing the chalk into the salt. Brush out the pie tin onto the paper. Store in a plastic baggie.


Now to make a picture simply spread glue with a paint brush on your desired design. If it is meant to be something more detailed you will want to do this in sections letting each section dry before moving on to the next. Once dry shake off excess.

If you are like me and love those old fashioned sand jars here's what you'll do . Take a clean jar with no markings or imprints on it and either simply pour layers of sand into the jar and moving around with a skewer up and down to get a ripple effect. I have heard of people sealing this off with Elmer's Gel Glue but I have not tried it so this would be something you might want to try.

You could also use the sand in a clear glass making the ripple effect and placing a tea candle in the middle , like the one at the top of the blog.

Sunday, September 25, 2011

Mundane Lives?

We all have days where we feel a little overwhelmed with life. We all would like to go back in time I think. Yet we as a society in my opinion and from what I have seen most wouldn't know what to do if we did. From what I can tell most people are all looking out for themselves these days. There is no respect for our elders , it's easier to put them away somewhere and wonder what they will leave when gone. And as far as our youth? Well , there was a time it took a village to raise a child but now it seems it takes cold hard cash.
I myself have always loved learning from my elders they have so much to share so much to offer us.
As for the children , why should anyone be concerned with someone else's child or what they are doing , right? It's none of their business and they could get sued or something if they interfere. It's just not worth it to speak up , seriously you could get shot or something either by the parents or the child themselves. When did we as a society let things get this bad and why aren't we doing anything about it?
Me personally , I will tell a child what I think if I know they are in the wrong even if they are not my child , how else are they to learn? If need be go to the parents and if a solution can't be reached then talk to your child about it  , how you feel and think as well as what you expect from them I still think this is the best and most impotrant Simple thing anyone can do for the children.
Now me , I still prefer to speak with a human then a machine or computer and love talking with friends face to face it is so much more personal. To many this could be considered mundane or even boring , with all the technology we have now why bother? For me the response is easy , the Human factor. You see to me the human factor is another important SIMPLE thing we can add to our lives.
When was the last time most sat down and actually wrote a letter to someone? No , not on the computer via email , an actual letter. It used to mean so much to so many once upon a time. What about an actual phone call instead of a text message? Wouldn't it be nice to hear the voice of you family member then to simply read their thoughts and feelings? This is something I am always complaining to my youngest son about. He is always texting me since to him making a phone call on his cell is much more time consuming and boring / mundane.
I wonder now more then ever when writing my blog posts if perhaps a Mundane life is exactly what we need instead of more of the "let's make things as easy as possible" that we have all as a society gotten caught up in. I mean why is it such a boring chore for people to make their own , why is it so hard to walk away from the t.v. or why is it such a hassle to spend time with family? I know everyone has a reason or in my opinion an excuse  and I say excuse because if people would stop and think , take a few minutes of their time to focus they would see they can do all these things and still be the responsible member of society they have always been.
So perhaps My blog should be named A Mundane Life , it's ordinary and to many boring or even commonplace. Maybe I should dwell on what I don't have and how much more I should have before I die.
But I do in fact like dreaming about things I may never have , making do with what I do have and spending time with people I care about. So I think I will keep my blog name A Simpler Life since that is what I would truly like to achieve not only for myself but to help others see some of the things I see going on in our society and with our children / grandchildren. I will post things I think will help bring a family closer while saving them some money so they will have time for the more important things in life. Post crafts , recipes , tips and tricks for making their lives a little more simple.

Saturday, September 24, 2011

Key to My Heart

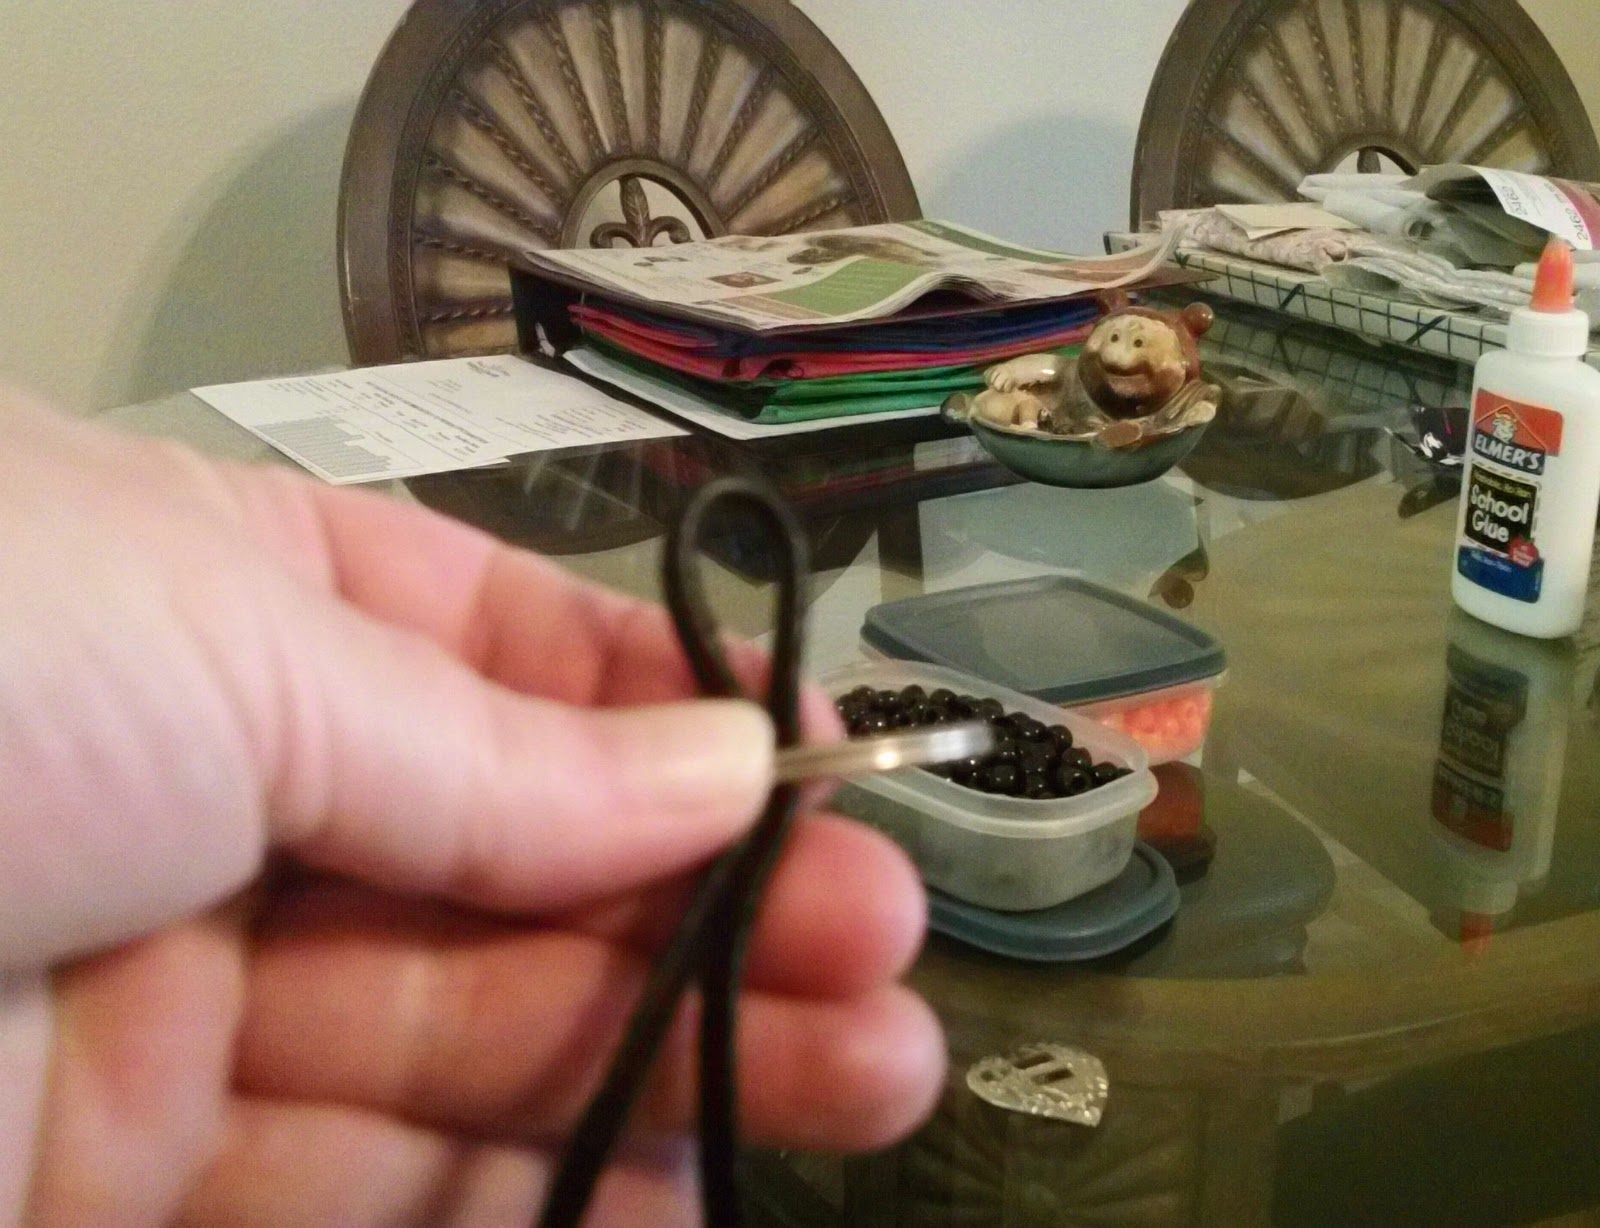
I have been making these for yrs. and always loved the simplicity of them. Some pony beads , a key ring , leather cord or other weaving cord is all you need. Every time I make these I am asked to make one for a friend or one of my children's friends. They can be as long or as short as you would like but keep in mind what keys will be going on the key ring. You don't want something to long with your car keys on it.

Fold Cord in Half

Place thru key ring

Pull thru loop & tighten

Do this 2 times / you'll have 4 strips

Thread 1 pony bead onto 2 middle strips

Thread 1 pony bead onto 2 outer strips

Thread 1 pony bead of diff. color onto 2 middle strips

Thread 2 pony beads onto 1 outer strip each side

Thread 1 pony bead onto 2 outer strips each side

Thread 1 pony bead onto 2 center strips

This is your top decoration


Take Concho and thread all 4 strips thru top

Pull all 4 thru bottom of Concho

Now thread as many pony beads as you would like
onto each strip and knot. Trim any extra off.

You can secure the Concho with a hot glue gun or
Super glue.

Thursday, September 22, 2011

Halloween / Tin Can Lanterns

Click the pics to enlarge

Tin Can lanterns are inexpensive as well as fun. Keep in mind you will have little ones all over and there are many inexpensive ways to light these little beauties up without using candles. Dollar Tree has Glow sticks of all shapes and sizes right now so I would recommend looking into that. But there are plenty of other non- flammable products out there should you choose to go that direction. ( this is great for those on a tight budget who might not be able to purchase pumpkins but still wan to decorate plus there's no rotting to worry about )

To get started get a few clean cans together. I have a can opener that doesn't leave a sharp edge , but if you have one that does you can simply push those down with a pair of pliers.

Some Nails , Clothes Hanger or string ( optional ), Plastic Baggie , Printed or drawn template and glow sticks.

You can draw your design onto the can with the permanent marker ( doesn't work very well ) or print a template / trace a template and place in plastic baggie. Fill the cans with water and freeze. Place baggie over the can ( this can be difficult since the can is going to get wet as it thaws. If possible use a couple of clothes pins to help hold in place at the top , very sticky tape works as well but may still come undone.) or as we did just simply free hand it and then start hammering the nail in , following the pattern ( the size of the nail is up to you ). Or you could simply punch holes all over with the nail.


I did opt. to use a candle for the pics


Punch two holes  , one on each side to attach the string. Thaw in sink. If using the clothes hanger snip off the ends and bend into a handle , push threw the hole and bend ends to form a metal handle. Tie a piece of string in the middle of the handle and attach the glow stick. It is now ready to be hung from any place you'd like to add a little glowing effect. Or place a little sand in the bottom  , add candle ( not recommended if small children will be in the area )  , glow stick or other light and place where ever desired and safe from being knocked over.

You can also paint the can if you like.

Wednesday, September 21, 2011

Topsy Turvy Planter

In an effort to do some growing I bought a Topsy Turvy planter. It doesn't cost much and I thought it would be great for growing threw the winter and help as far as my bug problems and trust me everything I plant outside gets attacked by one creature after the other plus the soil is poor and to get it in proper shape would cost a fortune.
So I bought it and a couple of tomato plants that do not need full sun, some good peat based soil and went to work. So far I am not to impressed , the hole for adding the plants is very small so I had to break apart much of the root growth just to get them in the thing. Then when adding the soil much of it fell out due to the openings for herbs. Not to mention the first watering , water went everywhere not that I filled it to quickly but due to those herb ports.
Now the poor tomato plants are struggling to regain growth and continue to seem unhealthy. I did use some fertilizer in order to help but so far I am not to impressed with this device. Of course it has only been 4 days , so I will hold off a final judgement for now.

UPDATE : So I wanted to give this new thing a chance but I can tell you I am fed up. Every time I water this thing it leaks all over the floor and this time it actually spilled out soil from one of the herb ports , what a mess! The plants themselves are doing so poorly I am going to hope they hang in there long enough to replant them into a pot.
If not I will purchase two more and start over. I am planning on moving some of the living room furniture around to make space in front of the sliding glass door so they can get plenty of sunlight. I am an experienced farmer and grew up planting and growing my own food so I think I am qualified to give a report on this product. Trust Me When I Say DO NOT BUY THIS PRODUCT!!!! Unless you plan on having it outside and filling every port I see no way it would work at all. And even then I don't feel you will get the results you are looking for. I am happy I didn't spend a fortune on this but am seriously disappointed in it. I would NOT recommend this to anyone. This product gets a serious F!!!

Tuesday, September 20, 2011

What Does Living Simpler Mean?

I was asked by a friend in my FB group what Simplicity was to me and what I considered living simply. This got me thinking for many days since my first response was that living simply and simplicity both meant being happy.
To others it may and I am sure does mean other things but I like the concept of simply being happy , being happy with what I have and even though I may have to make do at times still being happy in the fact that I am self sufficient.
Then I was asked , What does knowledge have to do with living more simply? And I thought to myself that is exactly the point , by that I mean if you have the knowledge to be self sufficient you can and should live more simply. Knowledge is power it always has been and always will be. Now please don't mistake what I am saying here , I am not talking about academic knowledge alone. I am talking about the survival instinct we all have within us that helps us to recycle products by making new ones perhaps out of what ever we have on hand , growing our own food , sewing our own clothing and on and on. Most of these things are truly becoming a lost art and I can't tell you how may people I have come in contact with over the years that think I am the most intelligent person they have ever met only because I think for myself and can make just about anything from anything. This saves money and to many people in these trying times , have to out of simple need. Our unemployment rate is threw the roof and living on what little they get from the government has many asking how they are going to get by. I say by living more simply , ask yourself what are your true needs? And then ask yourself what you can do about it. Think outside the box and back to a time before all the modern conveniences we now have. How did they survive during the 19th century or even before? If they could do it surely with all the things in our lives these days we should be able to as well , plus we are better educated and anyone wanting to use the internet can even if they have to go to their local library to research ideas and ways to get by. I know from experience since as a child and even once as an adult I was homeless for a time , not knowing where my next meal would come from or how my family would survive. I learned very quickly to do for myself.
Everything I blog about is to help others live more simply including myself. I found myself getting caught up in the buy it already made it makes things easier , notice I said easier not simpler. The reason I say easier is due to the fact that everything I buy costs money , money that has to be worked for. So work harder to make more money to make life easier? This just doesn't make sense in my mind. I would rather make and do for myself with what I already have and only purchase what I truly need in order to sustain my life. An example of what I truly need and can't make myself being , my A/C is out right now and it is hot out but it's not as bad as one would think , yet I can and have to admit I would not even think of living without A/C ( Not Ever ). I needed a new toilet the other day when my husband was putting in new flooring , since I can't make one I had to go purchase one. Yet when veggies and fruits are on sale or free ( I wish ) , I can and make jams and preserve my own veggies. This is healthier and more cost effective in the long run.
Living more simply also allows us time together as opposed a family working 2-3 jobs may not have. We talk more and do more together , usually having a Great time depending on the project at hand. We are a normal family we have our moments....lol
As you can see living more simply and the word easy are not the same. I would never tell anyone living a simpler life is easy it does take work but everything in life does. But do I want my husband killing himself to provide for us? No way! Knowing that he is home more and spending time with us makes me happy as it does my 9 yr. old so by living more simply and doing for ourselves we are happier.
These are only my thoughts on living more simply or a simpler life and I know I will probably get many comments on this topic. I hope that I do , it is wonderful to read and see how others view a topic. In this way we can learn from each other and make our lives and our children's lives better. But please keep in mind when you leave a comment regarding what I have said that it is my opinion , I am not putting anyone down for how they choose to live their lives. That is for each person to decide for themselves and I am in no way judging anyone for anything. Until Tomorrow Dear reader's ......

Friday, September 16, 2011

Homemade Hot Cocoa

With the first cold front of the year coming through the North I started thinking of what would be nice on a cold day and what better then hot cocoa? As always I prefer making my own and sharing is always a blessing. I have given this as gifts for yrs. now and everyone just loves it. This recipe can be jarred and decorated with ribbons , bows and even candy canes and given as gifts. You could also package it in a sealed bag and place in a seasonal coffee mug and decorate as well. Dollar Tree has some really cute mugs over the Holidays which will make this gift very affordable.

Ingredients :

2 C. Non-fat Dried Milk
3/4 C. Sugar
1/2 C. Unsweetened Cocoa Powder
1 tsp. Salt
1 C. Mini Marshmallows

Mix all ingredients and store in air tight container or bag.
To Use simply place 2-3 heaping tbs. into mug and add boiling water. When decorating be sure to include this on a cute little tag or something so the person receiving the gift knows how much to use.

Thursday, September 15, 2011

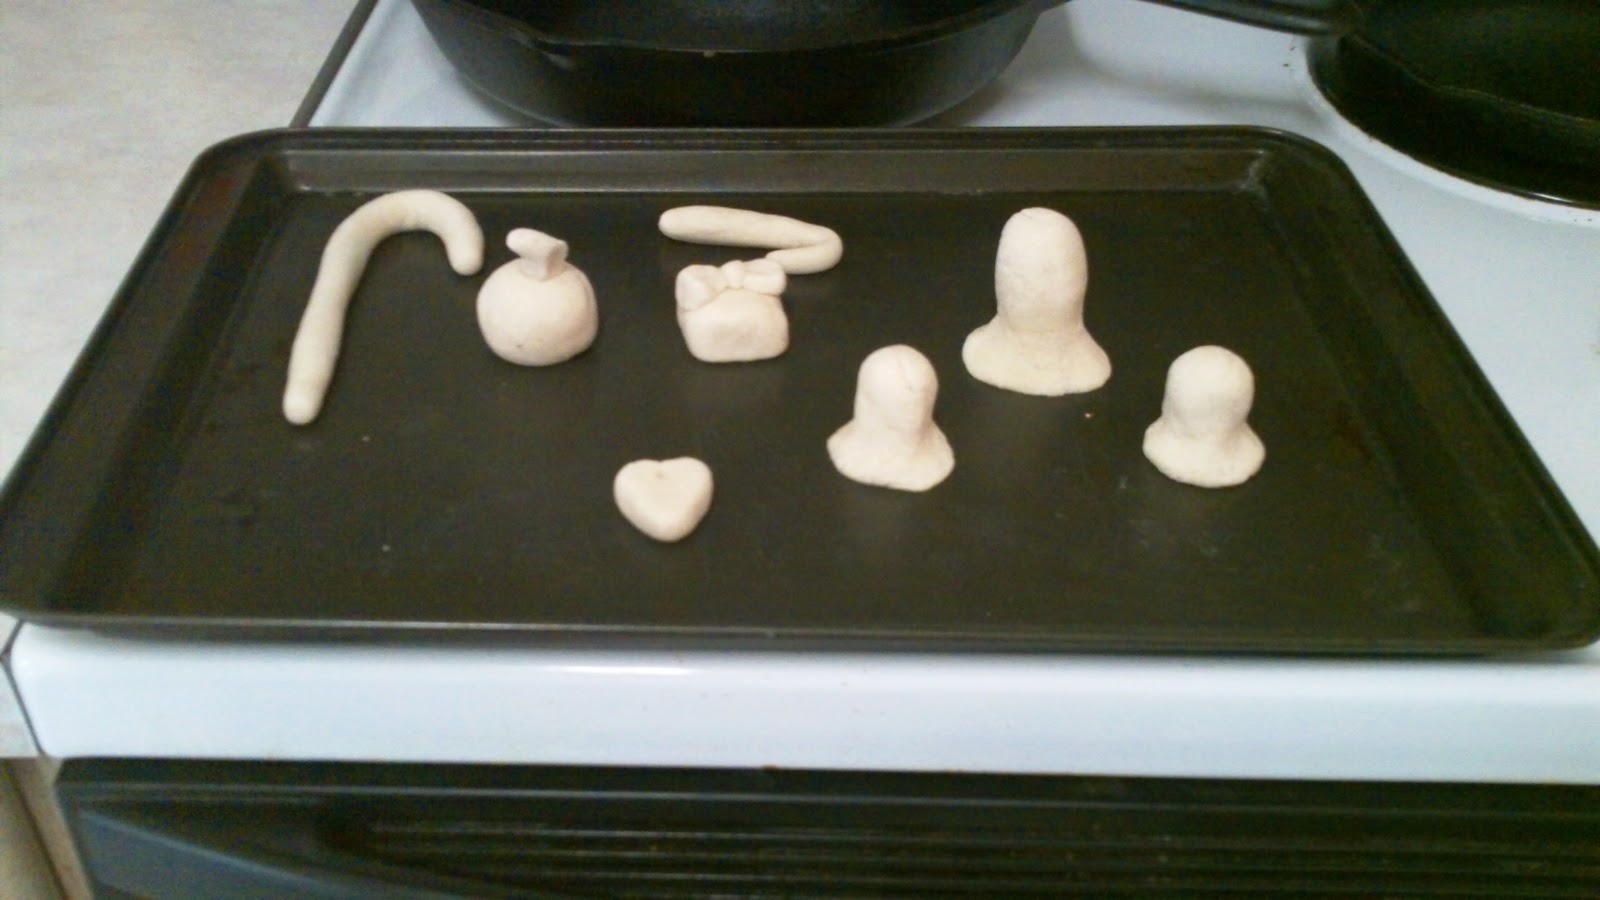
Salt Monsters

Most of the time we are looking for crafts that we can do for little to no extra money. And in this economy who has extra money? This recipe has been used time and again by parents over the yrs. The simplest thing to make are Ghosts but anything can be made out of this dough for any Holiday. And if your children are like my 9 yr. old they truly love to create and clay or dough is one of the best things you can hand them , letting them express themselves in so many ways.

** This is not meant to be eaten , it won't hurt you or your child if they do but it won't taste very good **

SALT DOUGH RECIPE :

1 c. salt
2 c. all purpose flour
1 c. water

Preheat oven to 250 f. Mix all ingredients until dough is formed , knead dough ( if to sticky add a little flour being very careful not to add to much or it will dry out the dough , causing cracking before baking).
Place on cookie sheet and Bake for 2 - 2 1/2 hrs , checking the bottoms for wet spots. If still wet add an additional 20 mins. to bake time.
Allow to cool fully aprox. 4 hrs. or overnight. Once cooled completely paint and decorate , this can be done with tons of items you already have in your home. These little guys can be sealed with an acrylic sealer. We use my sealer for my polymer clay but they are fine and just as nice if you decide to not seal them. Or you could even use white glue as a sealer , they will appear white and cloudy but once dry they will be clear and shiny.

**Here's a useful tip for crafter's looking for something more. Make smaller ghosties and turn them into earrings. Be sure to seal them and to make a hole in the top before baking to place your eye pin.**